Plotting Tool Options
There is a wide array of tool options to assist you in navigation plotting. All have pluses to recommend them as your “go to” tool. Unfortunately, all also have cons that make them less desirable or more challenging to use. This tip is specifically how to use navigation protractor triangles (just call them triangles). For a discussion of the plusses and minuses of the other options, check out the lesson on “Navigation Tools – Plotting Tools“
Using Navigation Triangles
Why Triangles (aka: What is a Protractor)
Before we talk about why I prefer using triangles over the other plotting tool options available to me, let’s talk about the down side.
- Quite simply, there is a bit of a learning curve to use them well. However, most everyone that I know who has learned to use them asks why they thought it was hard. That’s it, the down side is a pretty short list.
The Up Side (why I prefer them)
- They are less prone to slipping when you are using them.
Think rolling boat in 6 foot seas. Less tool slippage is good! - They are more accurate.
Using the compass rose to read directions at best you can see 1 degree of accuracy at best. Using a triangle actually allows you to estimate directions that fall between the 1 degree marks. - There is a built in “reciprocal” scale.
One of the more common mistakes I see is marking the reciprocal of the course you want. For example, a course of 260 marked as 080. One time, in a class I was teaching, we were leaving Santa Cruz Harbor. The first course to get out was marked correctly. The second course was inverted to the reciprocal of the correct course. 180 degrees the wrong way. I noticed the error, but let it happen as a learning experience. The net result. When we made the turn to the new course we were pointed directly at some rocks. The class realized right away there was a problem, figured out what the problem was and fixed it. That was in clear weather. Would they have realized it in fog? - There is a built in scale of “Cardinal” and “Intercardinal” Points.
Whoa … what is that? Cardinal Points are North, East, South, and West. Intercardinal Points are in between. For example, between North and East there are NNE, NE, and ENE. - There is a built in milage scale.
If you are using a chart with a 1:80,000 scale (check the scale Martha’s Vineyard to Block Island Training Chart) you don’t have to mess with the latitude scale to find mileage. It is build in along the long edge of the triangle. 1:80,000 is a very common scale.
How to Use Navigation Triangles
Drawing a Course Line
To draw a course line from Point A to Point B, you pretty much need a straight edge long enough to stretch from one point to the next. A single triangle is about 10 inches long. Two of them laid long edge to long edge will easily stretch 18 inches. Drawing a line longer than that will require a separate straight edge, such as a ruler or that parallel rule sitting unused in your navigation tool drawer.
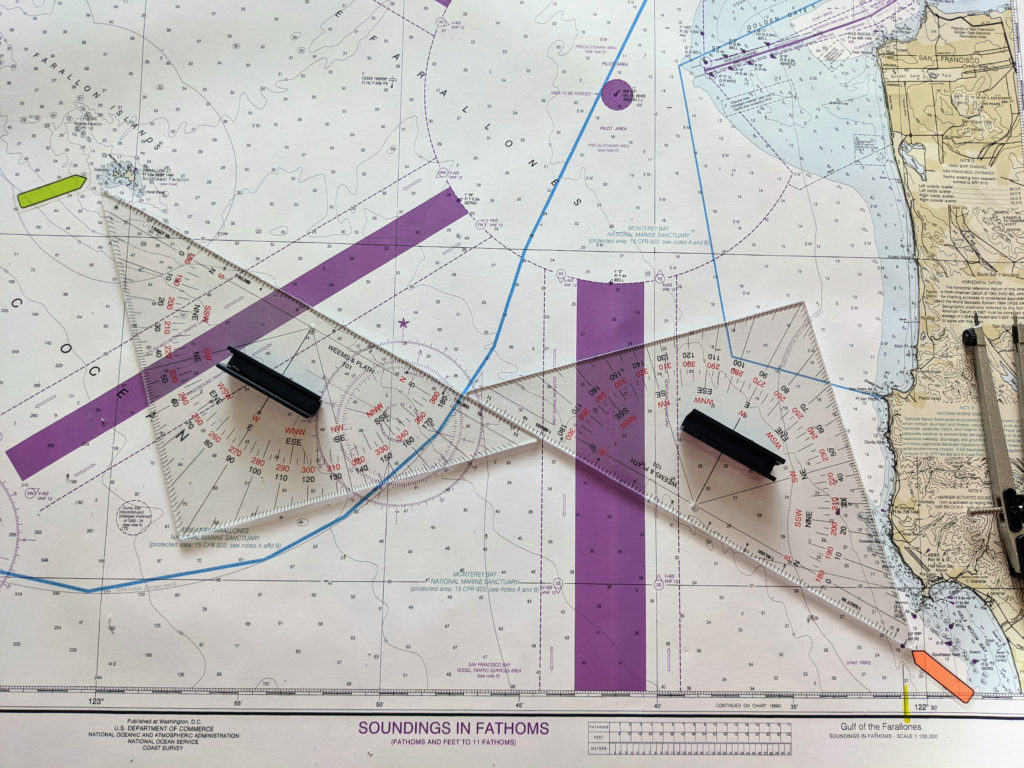
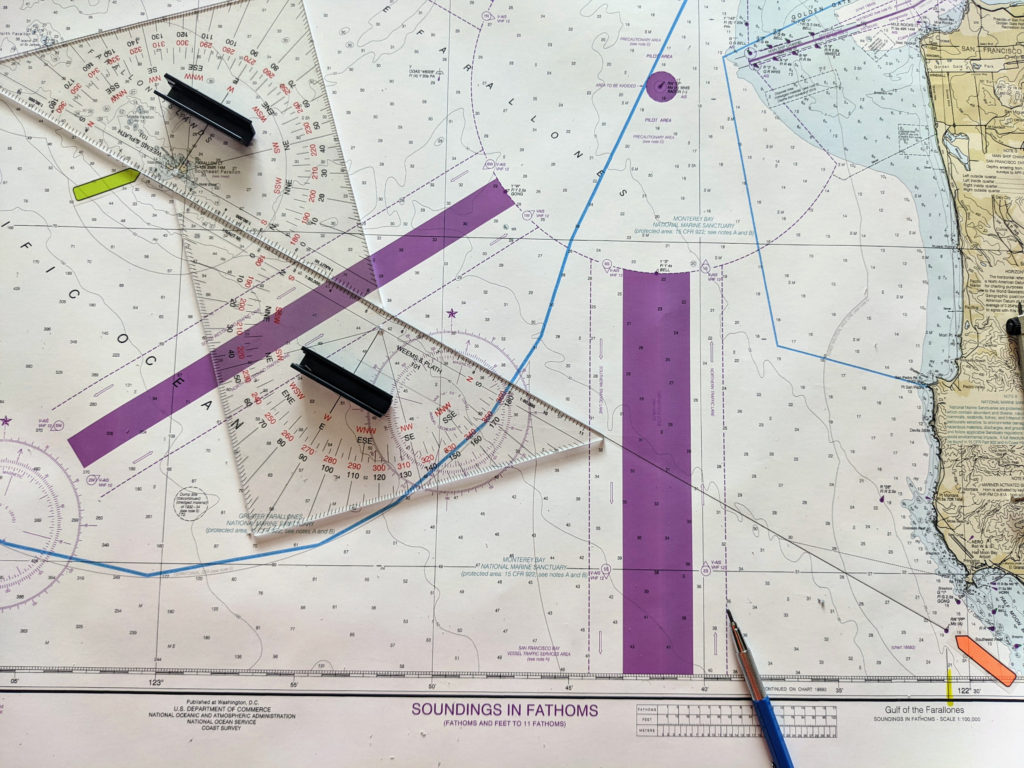
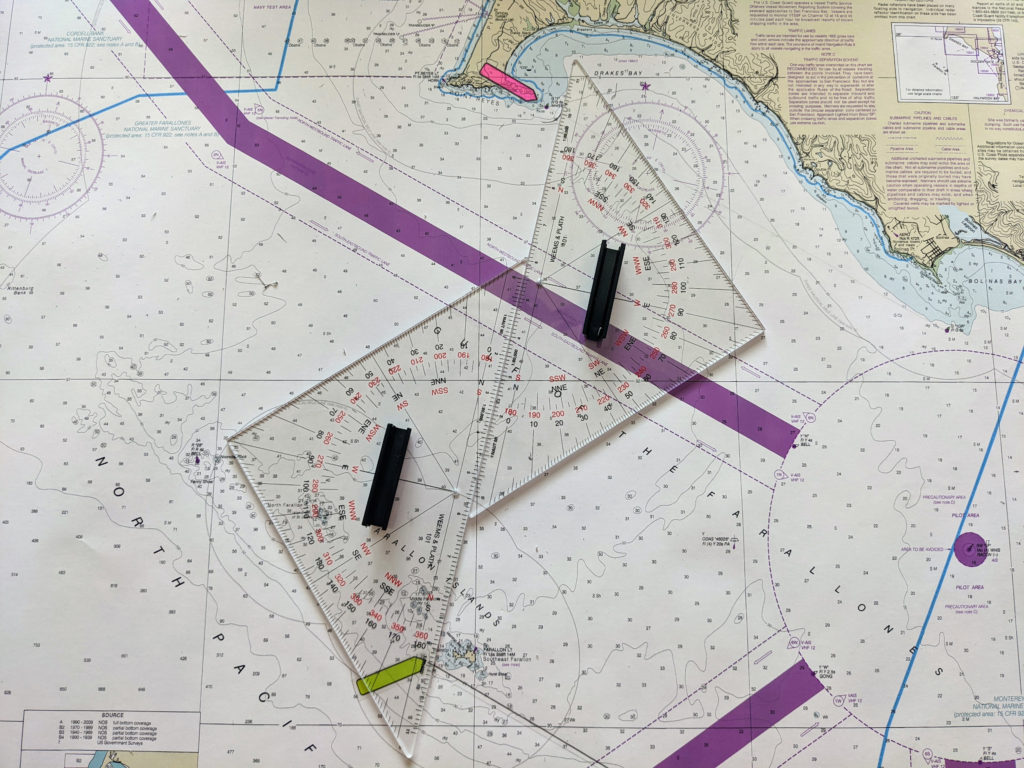
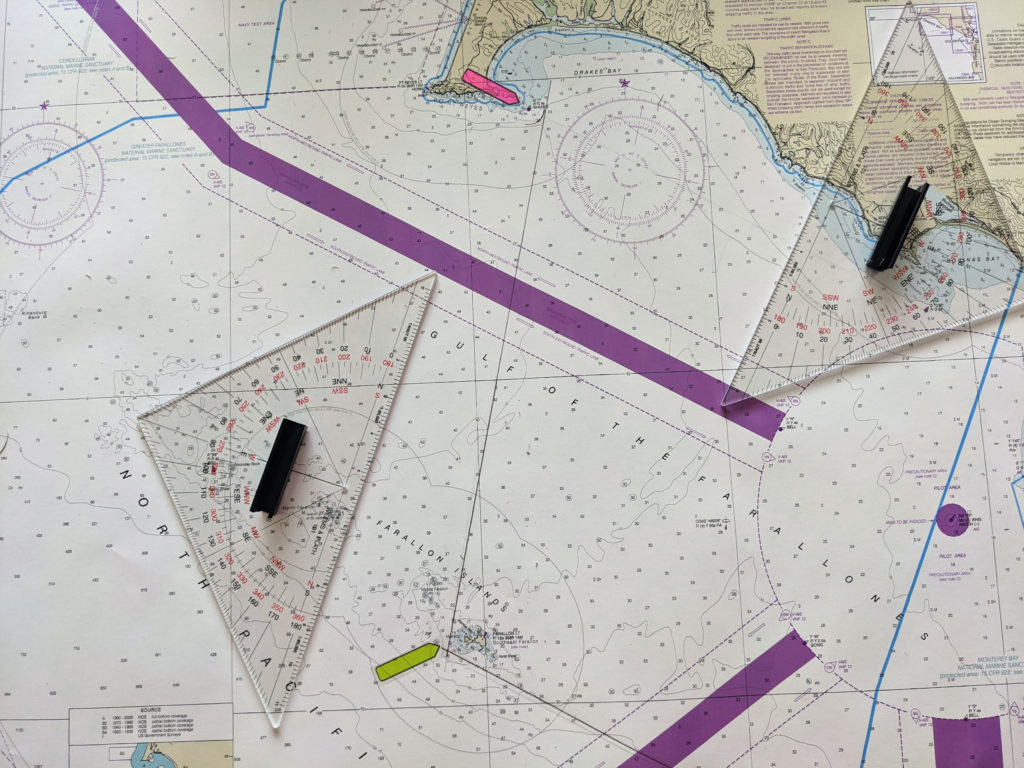
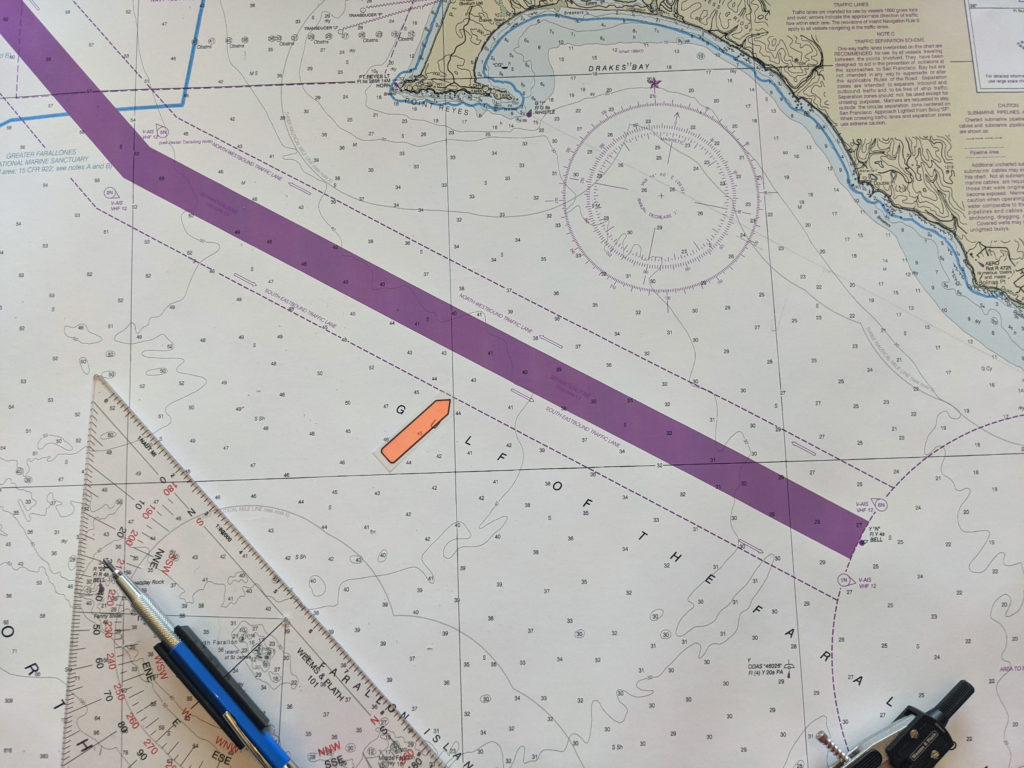
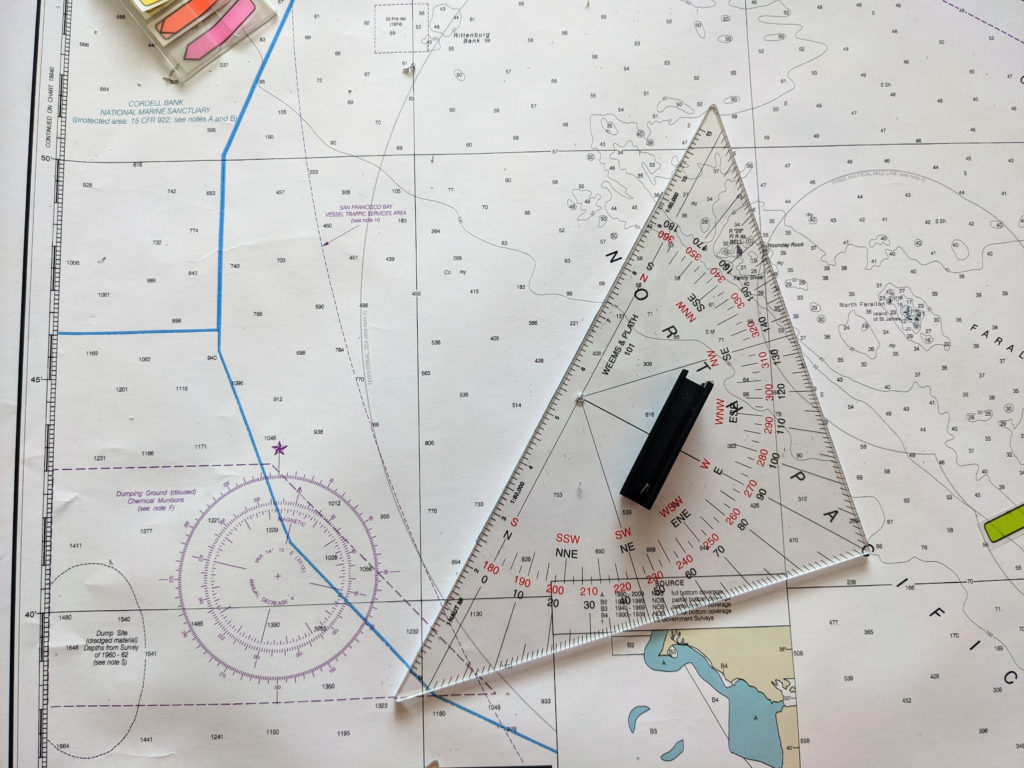
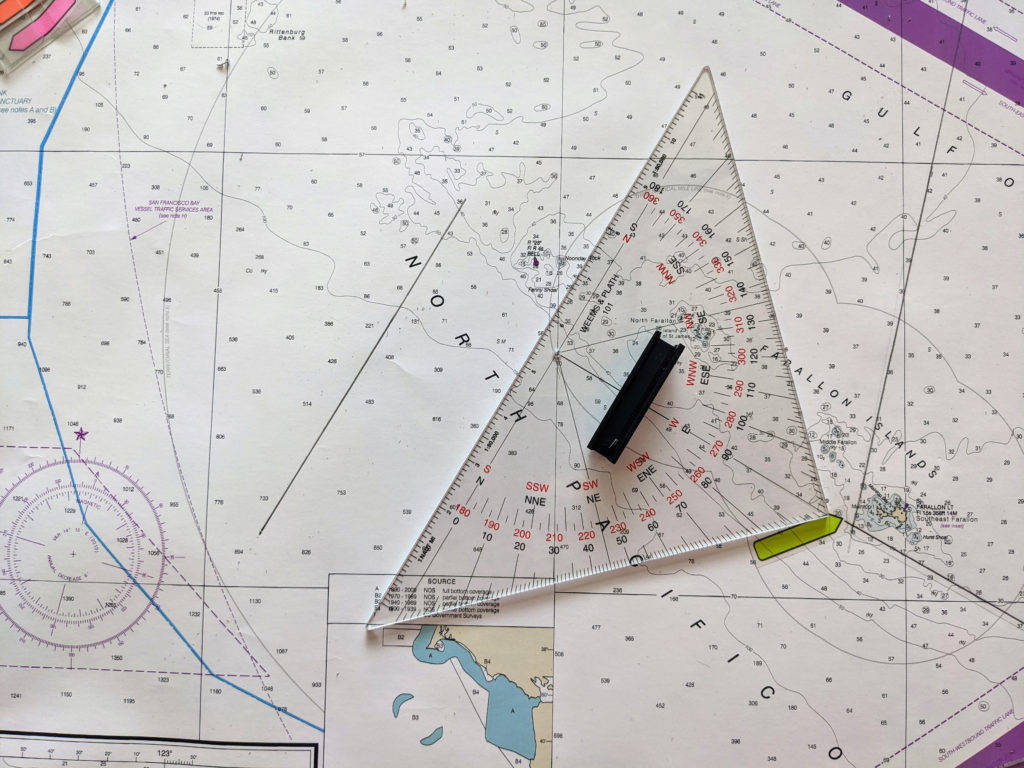
For example purposes, let plan a course from the Pillar Point safe water mark outside Half Moon Bay (orange arrow in images) to Drakes Bay, going around the west side of Southeast Farallon Island (green arrow in images).
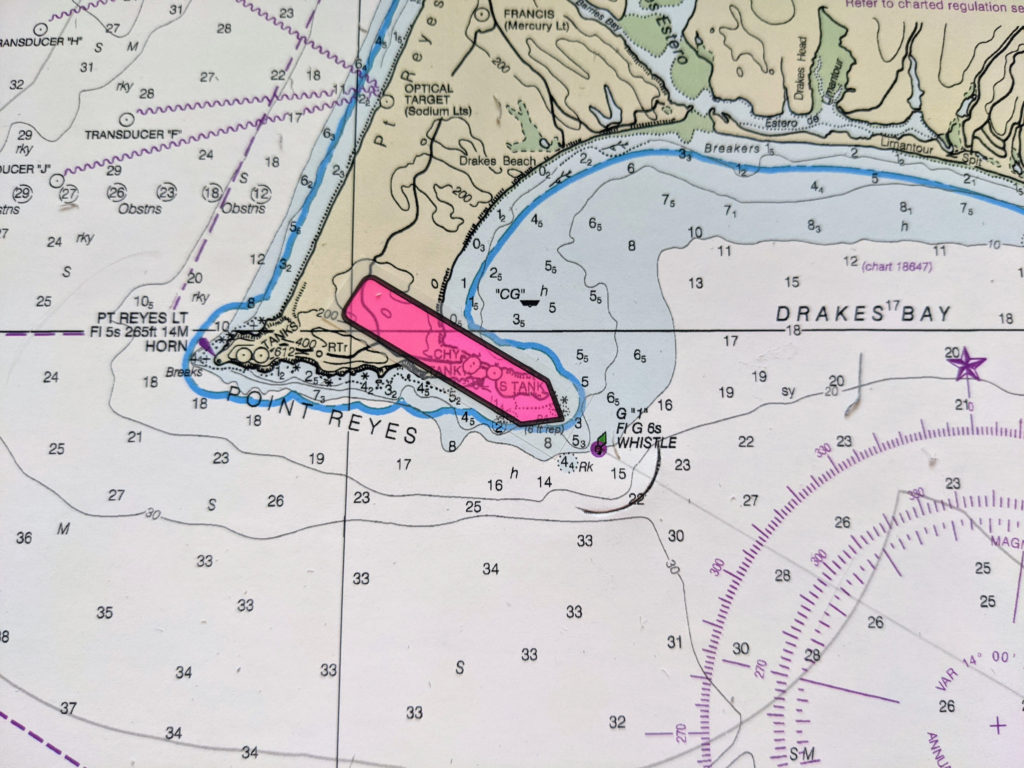
Knowing that Southeast Farallon Island can be dangerous, we will plan to stay in water deeper than 60 feet (10 fathoms). We will also plan to stay .5nm away from the green buoy marking the reef at Drakes Bay (pink arrow in images).
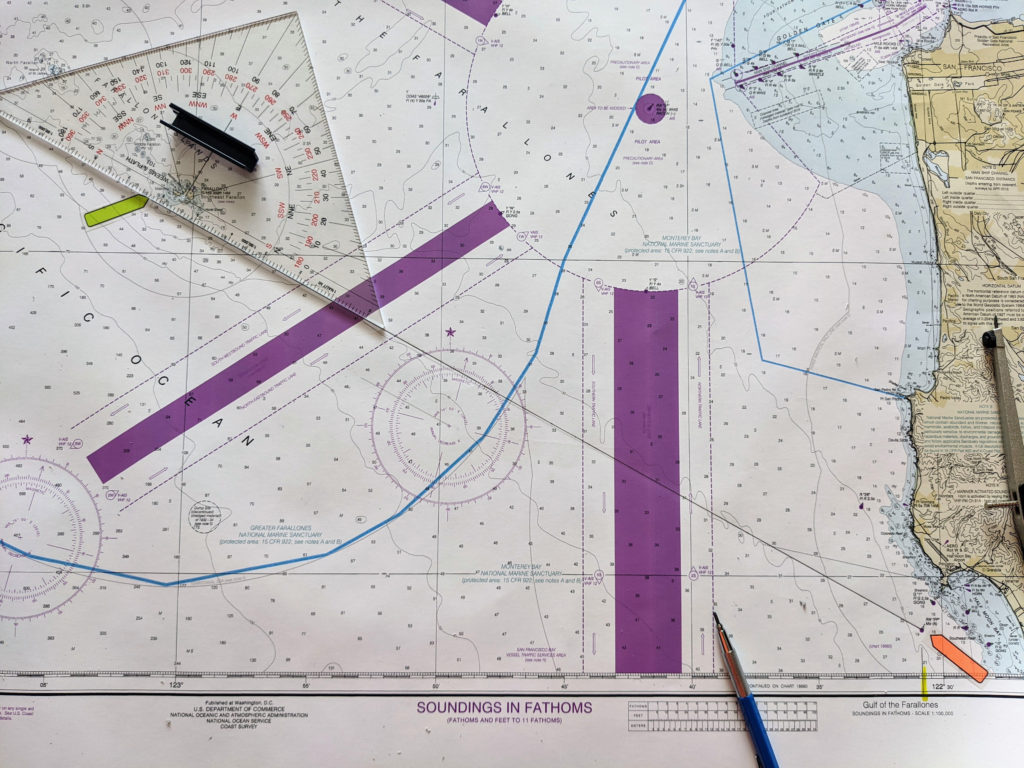
The Second Half of Voyage
Determining Directions of a Course Line
One of the most common tasks to be done during navigation is to determine the direction of a line. It might be a course line. It might be bearing to an object. Or, you might be setting up a straight edge to draw a line. Whatever the reason, this task will be done over and over.
The Process
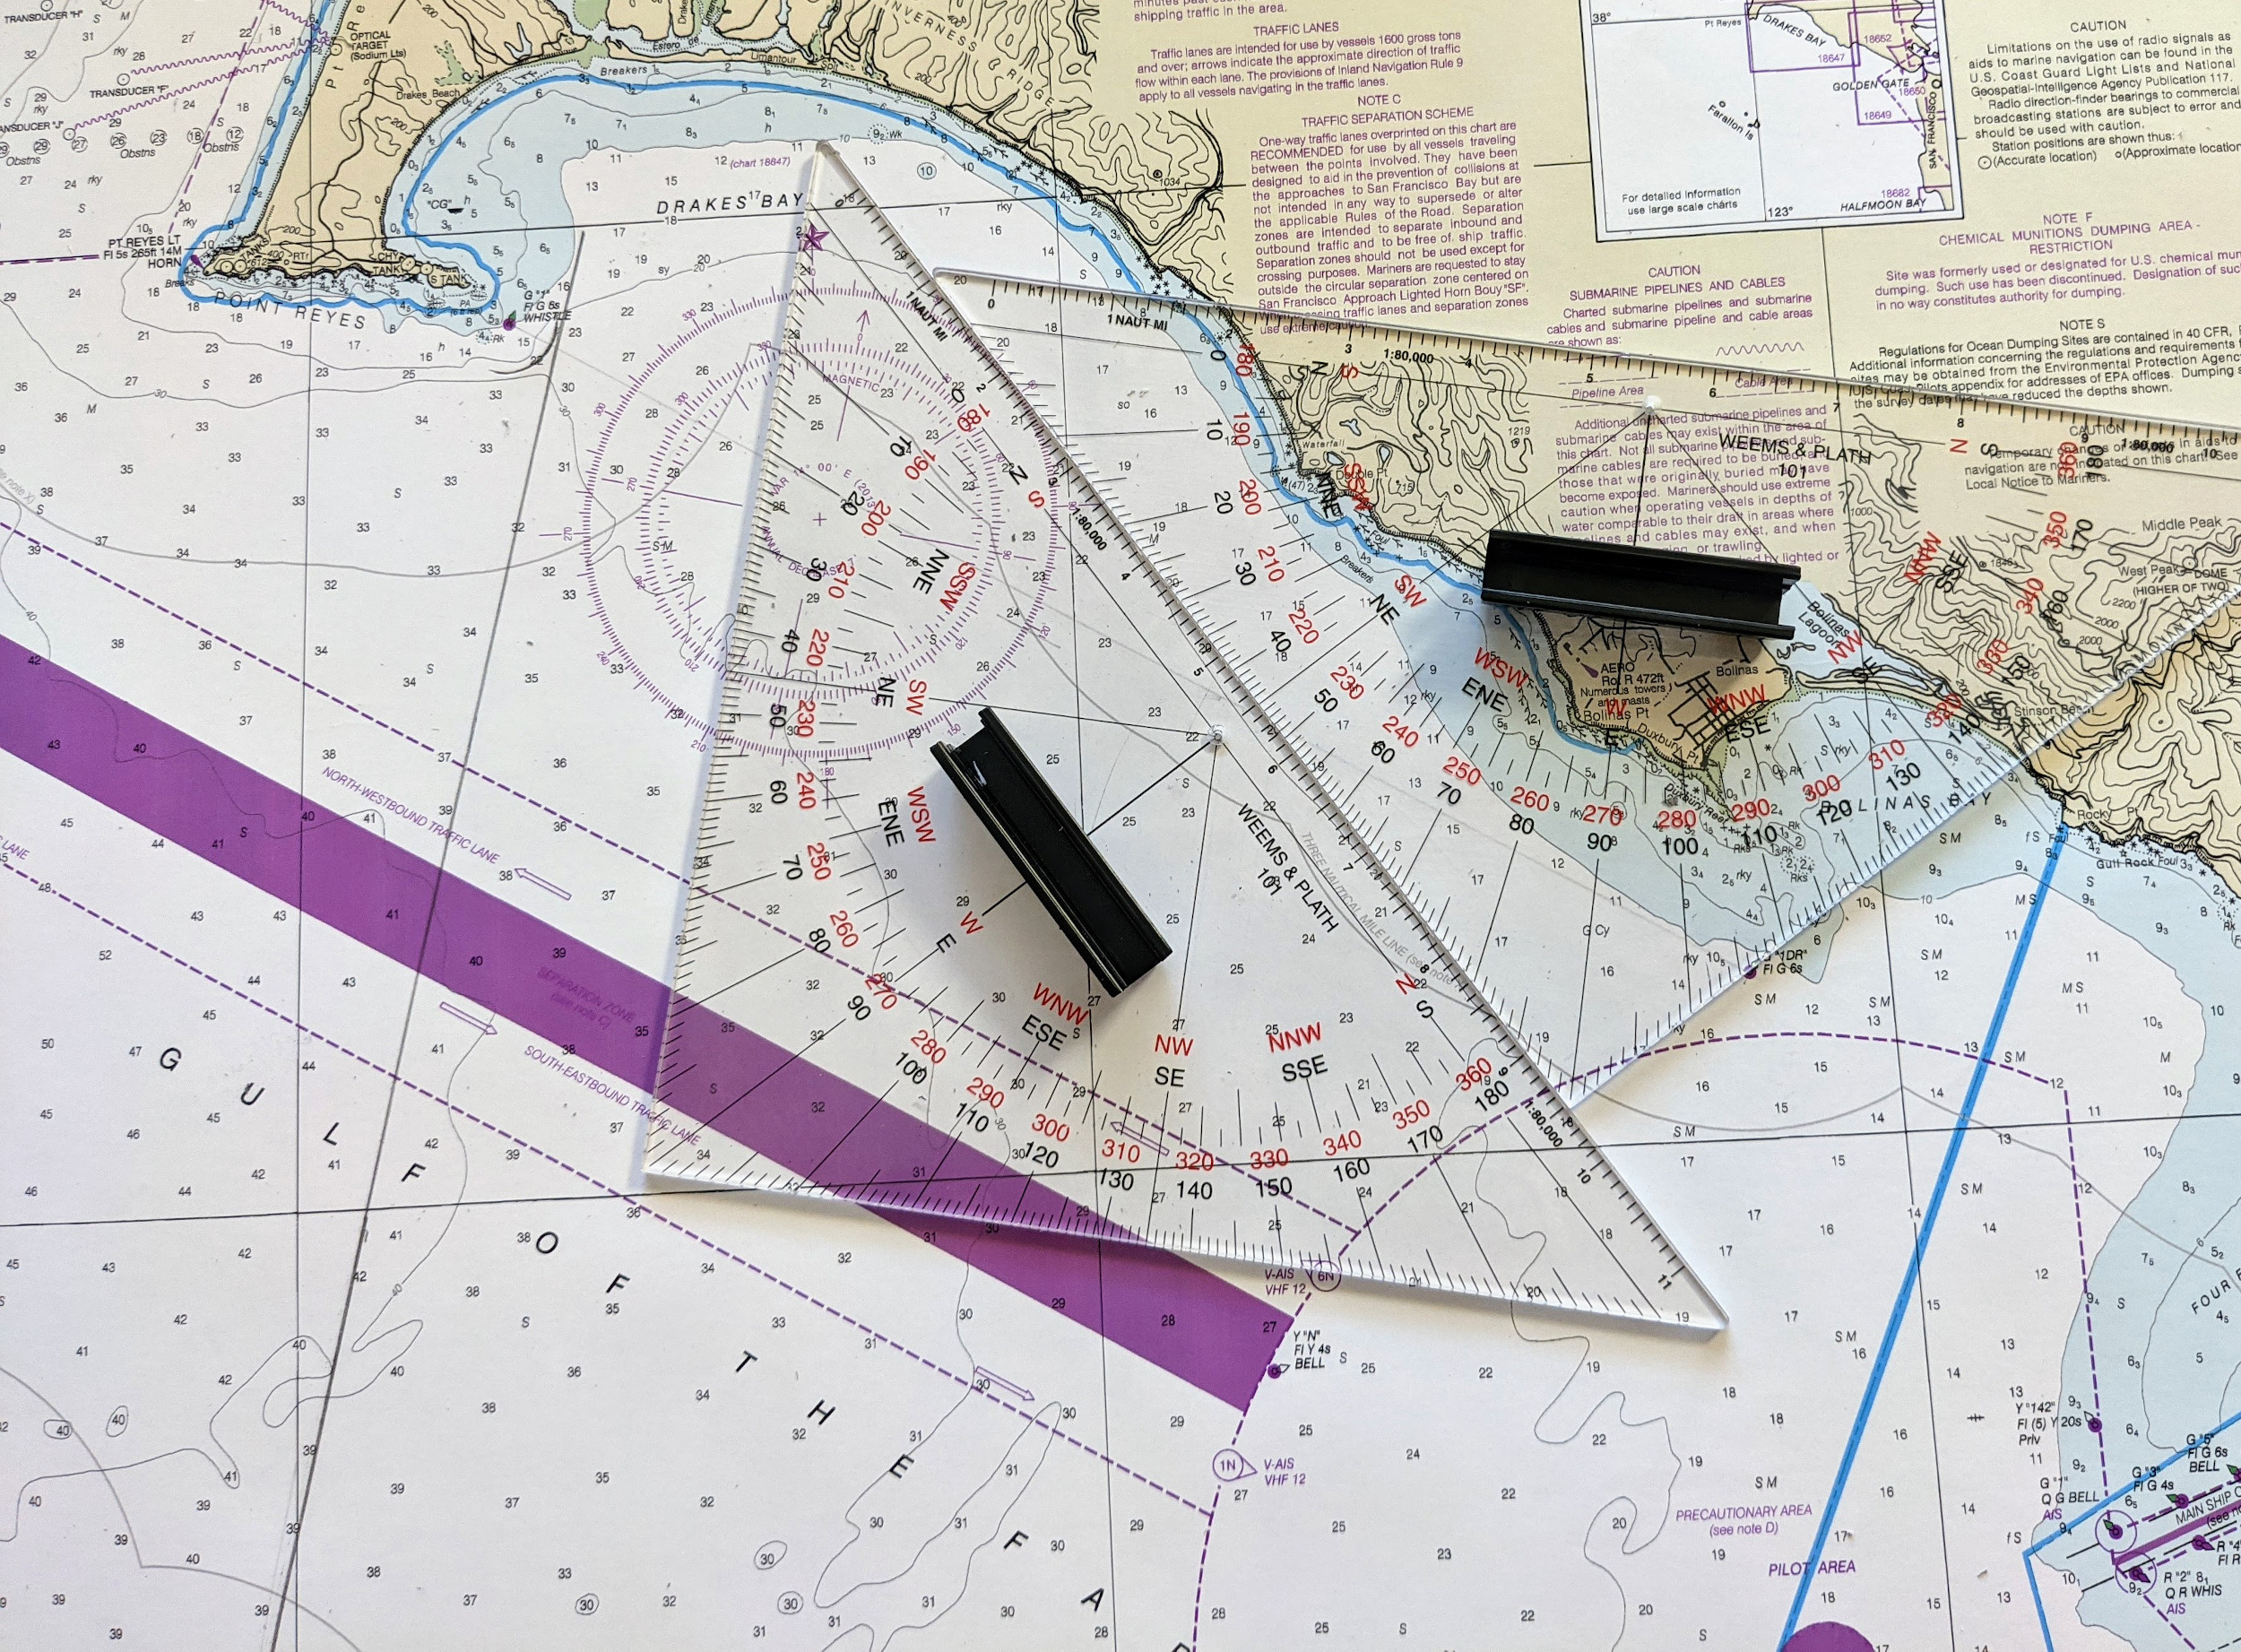
The first thing to ask is; “Does the “line” cross any line of longitude printed on the chart.” If it does, your job is easy and only one triangle is needed.
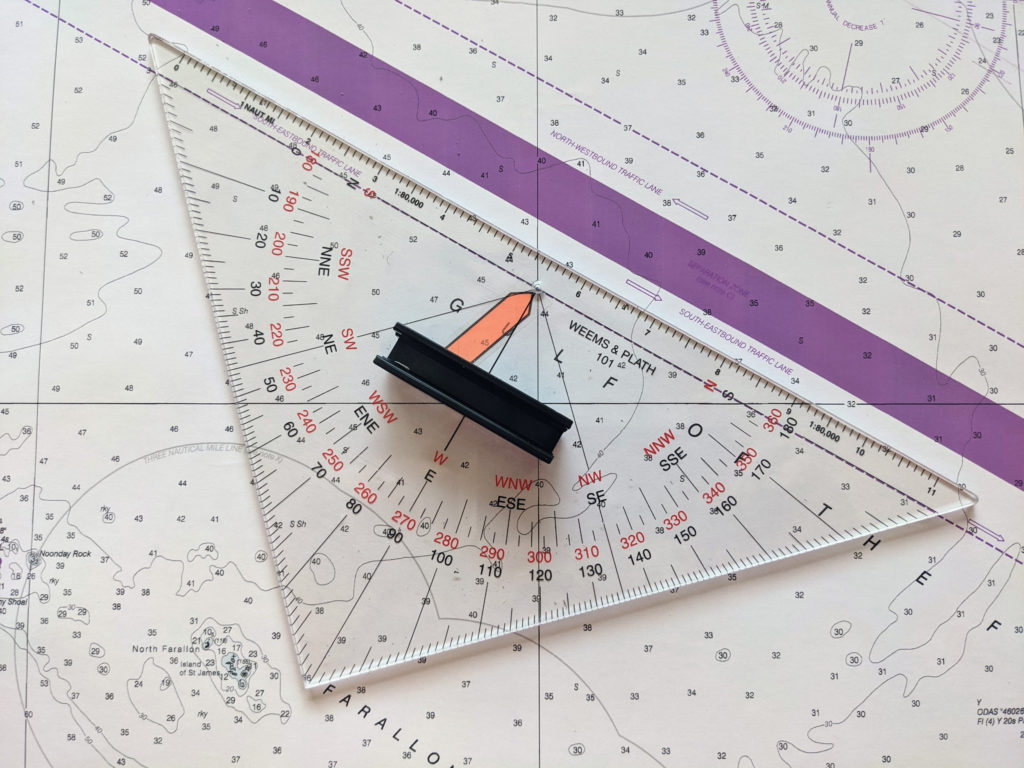
- Hold the triangle’s right angle toward you.
- There is a black line etched into the long side of the triangle. It is about 3/8 inch from the edge. There is a hole in the middle of the etched line. Put that hole directly on top of the spot where the line to be measured and the longitude line cross.
- Rotate the triangle so the etched line is on top of line you want to measure.
- Read the direction from where to line of longitude “exits” the triangle.
- Remember that the triangle reads both directions the line travels. Make sure you use the correct angle, not the reciprocal. Any direction that heads east of the North/South line uses the smaller numbers. Any direction that heads west of the North/South line uses the larger numbers.
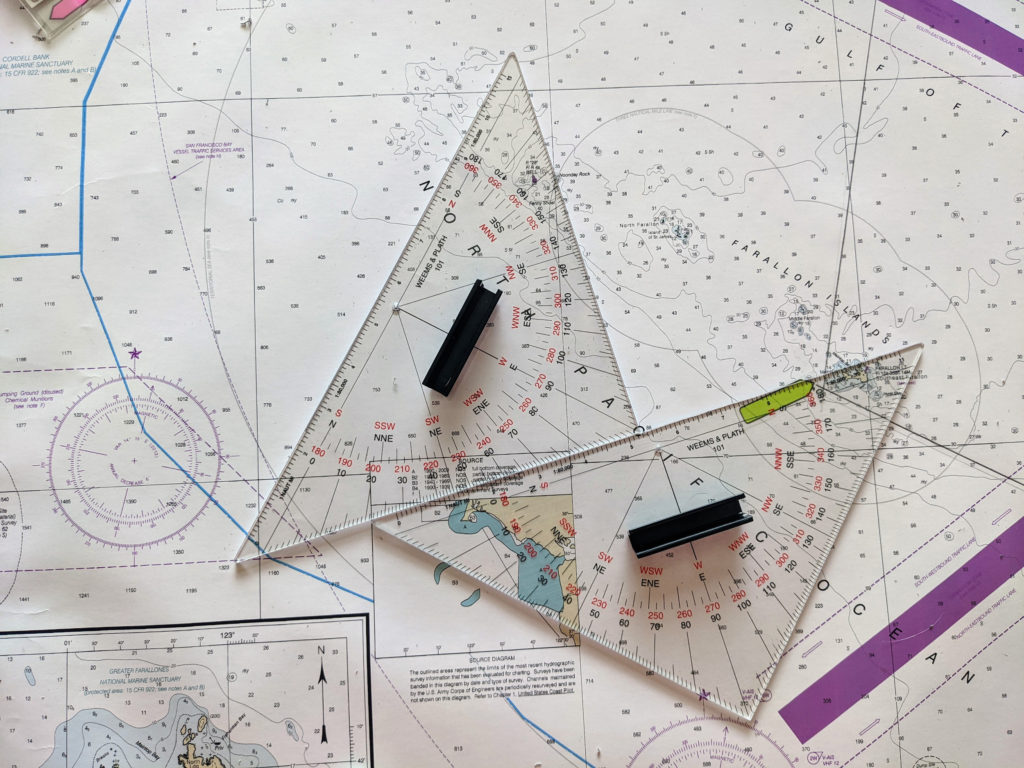
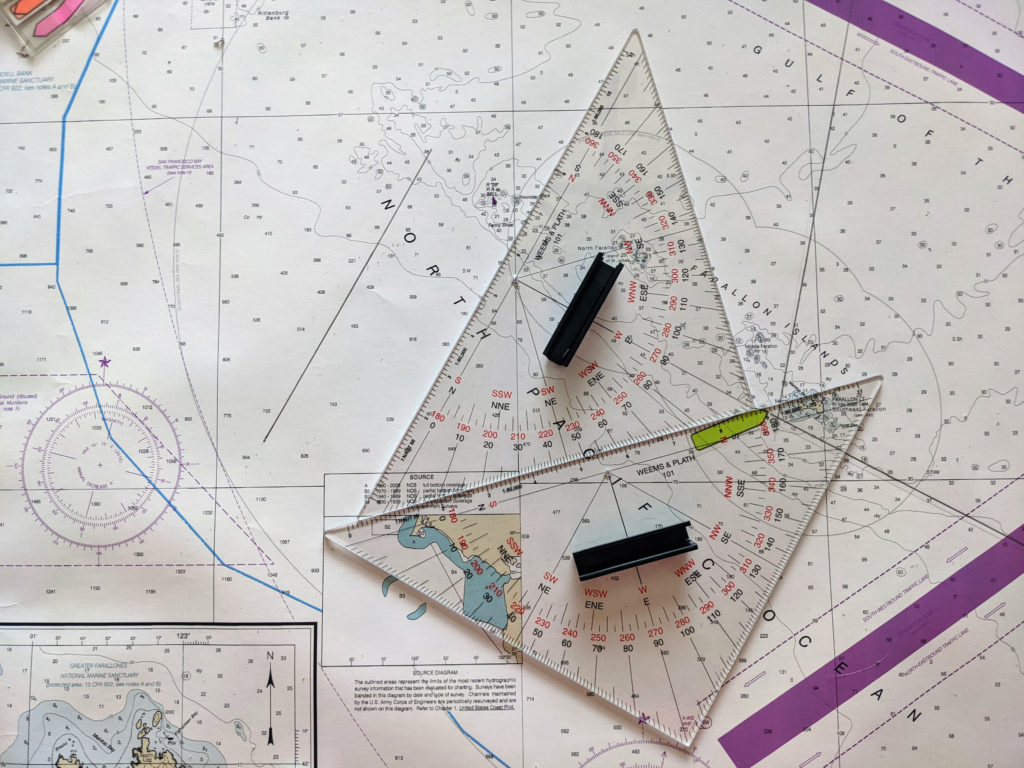
If the line does not cross a printed line of longitude two triangles are required.

Tangents (aka: How do I Know When I am Abeam an Object?)
There are occasions when it is beneficial to know at what point you will be abeam a specific object. With triangles, this is a snap. Simply lay the long edge of the triangle on the course line. Butt the 90° angle of the second triangle against the first and move it so the other short edge passes through the object.

Triangles and the Compass Rose
When using navigation triangles, the compass rose found on every chart is only used for one thing. To determine variation. Since you will not be “walking” the course/bearing line over to the compass rose, you can not use it to determine magnetic directions.
When using navigation triangles, all directions will be in degrees true. Calculations must be done to convert to “magnetic” or “per ship’s compass”. If you need a refresher on how, help can be found at TVMDC.
Help to Remember How to Find Courses and Bearings
Using navigation triangles can be a bit frustrating at first. Here are two pieces of advice to help you during the learning process.
- To find the direction of a course line, first lay the black course line on the triangle on the drawn line, then use a straight edge to move the triangle’s focal point to a line of longitude.
- To draw a specific course or bearing line, first find the correct direction by placing the focal point on a longitude line and rotating the triangle, then use a straight edge to move the triangle to the bearing object or course starting point.
Put Another Way
If you know the bearing, locate the bearing and move to the line.
If you know the line, locate the line and move to a longitude line to find the bearing.